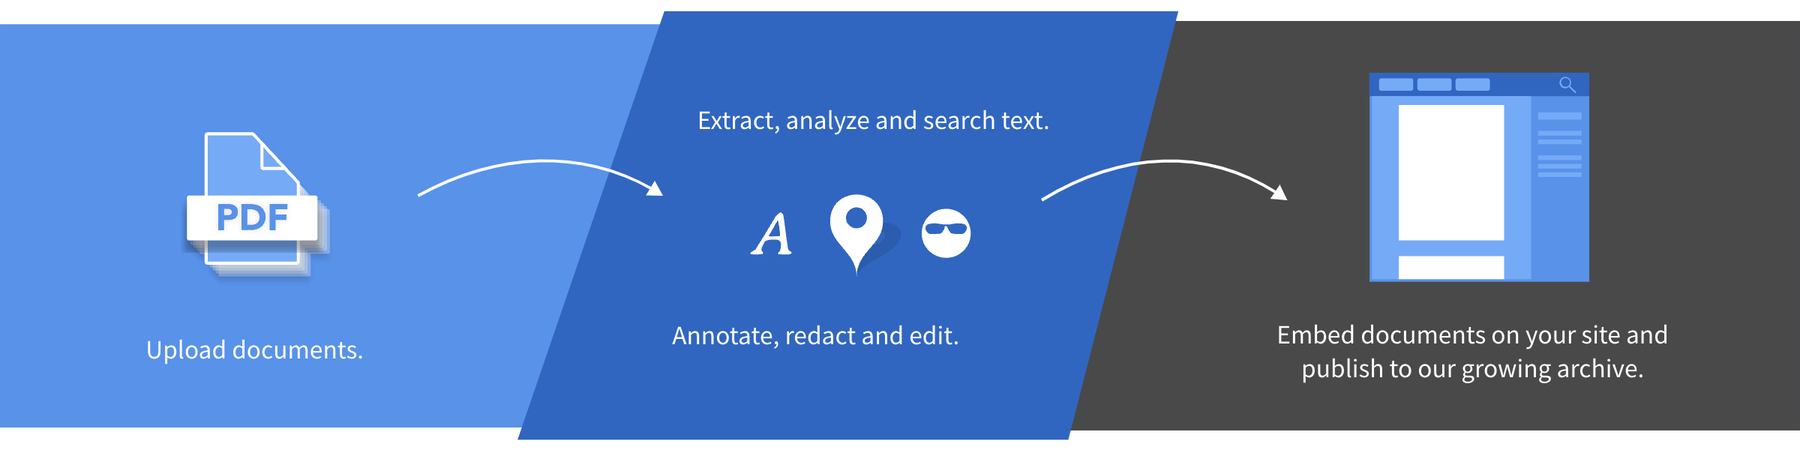
DocumentCloud’s standard user interface already includes features like searching within and across documents, project management, collaboration, document annotation, redaction, access control, entity extraction, PDF modification, tagging, embedding, adding a table of contents, the ability to email in documents and much more.
But what if we, as a community, wanted to do more on the platform or tailor additional functionality to our needs? Over time, users have adopted the use of the DocumentCloud API, including the DocumentCloud API Python wrapper, to develop scripts that they run internally, but rarely do these programs make it out of local newsroom environments and shared in a collaborative way to improve DocumentCloud for all users.
This is why earlier this year we introduced Add-Ons, community-developed, open source extensions of DocumentCloud. With the ability to automate anything a user could do via the normal interface as well as integrate with a range of third-party services, DocumentCloud users can now:
- set up web scrapers (Scraper)
- extract tables from PDFs (Tabula)
- transcribe audio (Transcribe Audio, powered by OpenAI’s Whisper)
- summarizing documents (Summarization)
- Permanently archive their documents through Filecoin or the Internet Archive
…and so much more.
Since Add-Ons build on the commonly used Github Actions and existing DocumentCloud API, we have tried to lower the barriers for developers seeking to contribute to and expand the functionality of the DocumentCloud platform. We also are making it easier for all of our users to get more out of their research using powerful tools like machine learning and language recognition, among others. You can see some of these Add-Ons in action in our DocumentCloud Add-Ons 101 video.
Cloning the template
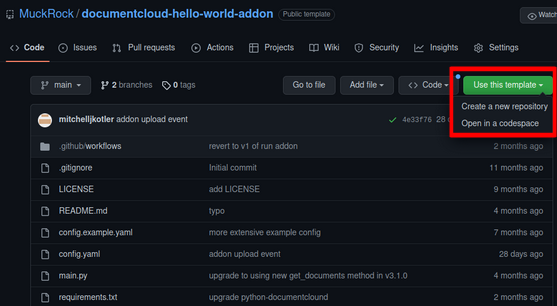
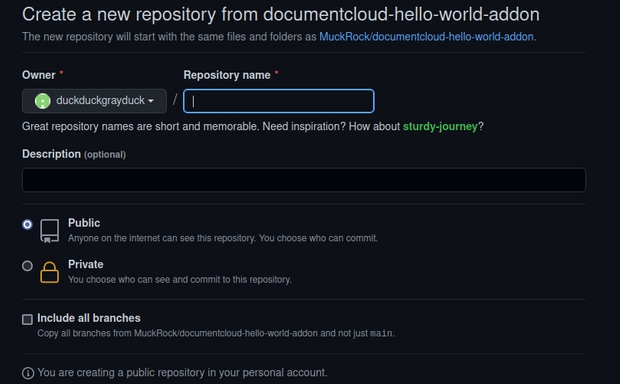
To get started, you’ll want to sign up for a GitHub account and then use our Hello World template Add-On to get started with all of the files you’ll need to edit to get started with your first Add-On. You can click “Use this template” -> “Create a new repository”. You may make the repository public if you plan on eventually seeking code review to include in our growing DocumentCloud Add-Ons library or you may keep it private for only yourself or other members of your organization to use.
Note: To get added to the public directory of Add-On available to other users on DocumentCloud, the repository will need to become public and the Add-On will undergo a code review.
Give your repository a meaningful name, note that this is not the name of the Add-On when you run it from within DocumentCloud. This is set within the config.yaml file later.
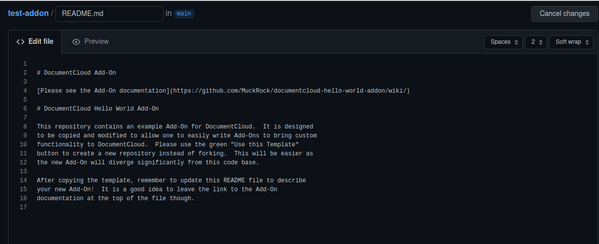
When you’ve cloned the template, you’ll see a README file, which you’ll want to edit to give a meaningful description of your Add-On and its intended functionality. This can always be edited later as functionality changes. It is recommended to keep the first few lines of the README intact as it links to the Add-Ons documentation, which is vital to understanding the Add-Ons class for future developers.
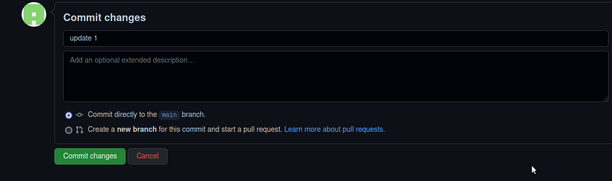
After you make edits, it will prompt you to write a commit title and description. Give your commits a meaningful title and description, because if you need to go back in your commit history to a point in the past, you can see where certain edits were made and go back accordingly. If you give meaningless titles/descriptions, it will make it harder for you to look back on changes you’ve made.
Editing the user interface
- The config.yaml file is where you set:
- The title of your Add-On The way of choosing documents you’ll allow for your Add-On (selection has a limit of 25, while query allows you to run an Add-On a larger set of documents based on the search query within DocumentCloud that is currently set)
- Properties for your DocumentCloud Add-On. There are the fields present when you run the Add-On, which is data that is provided by the user of the Add-On.
Note: If a property is required for your Add-On to function properly, you’ll want to mark it accordingly under another section under required:.
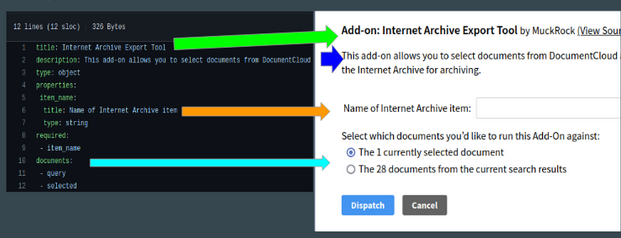
An example of a config.yaml from the Internet Archive Export Tool is available and how it maps to the user interface for the Add-On can be seen below. This file uses the JSON Schema format.
Implementation
Once you’ve set your user interface for the Add-On it is time to implement what the Add-On actually does by hopping into main.py. To pull information that the user provides, you can access properties directly from within the Add-On by modeling your code after:
property_name = self.data["property_name"]
An example is in the Internet Archive Export Add-On. I access the item name provided by the user in the following way:
item_name = self.data["item_name"]
To iterate through the set of documents (whether you configured your Add-On to run on selected, query, or both in config.yaml) you can use:
for document in self.get_documents():
You can of course import any Python library at the top of main.py, like in the Internet Archive Export Add-On I use a library written by the Internet Archive to interact with the API to their site.
from internetarchive import upload
Any external libraries that you import into your Python project in main.py should also be listed in your requirements.txt file. For example, since I referenced the internetarchive library in main.py, and it is an external library, I have to list it in requirements.txt for the Add-On to work properly.
python-documentcloud==3.1.4
requests
internetarchive
For the most part, most of your functionality will be written within main().
When the “Dispatch” button is clicked on the user interface of the Add-On, it will trigger a GitHub Actions run of the run-addon.yml present under the /.github/workflows/ directory in your repository, which will set up some environment parameters and call main() from within main.py.
There are other features that the Add-On class contains, such as
- setting messages
- sending emails to the users who run the Add-On when a certain event occurs
- setting a progress bar
- uploading files, such as the results for analysis, for the user to download.
All of these can be found in the documentation. The documentation for the Python Wrapper for the DocumentCloud API is also helpful, as all of those functions are also available to the Add-On, including managing projects, creating annotations, redactions, mentions, document manipulation and editing of metadata.
Editing the workflow
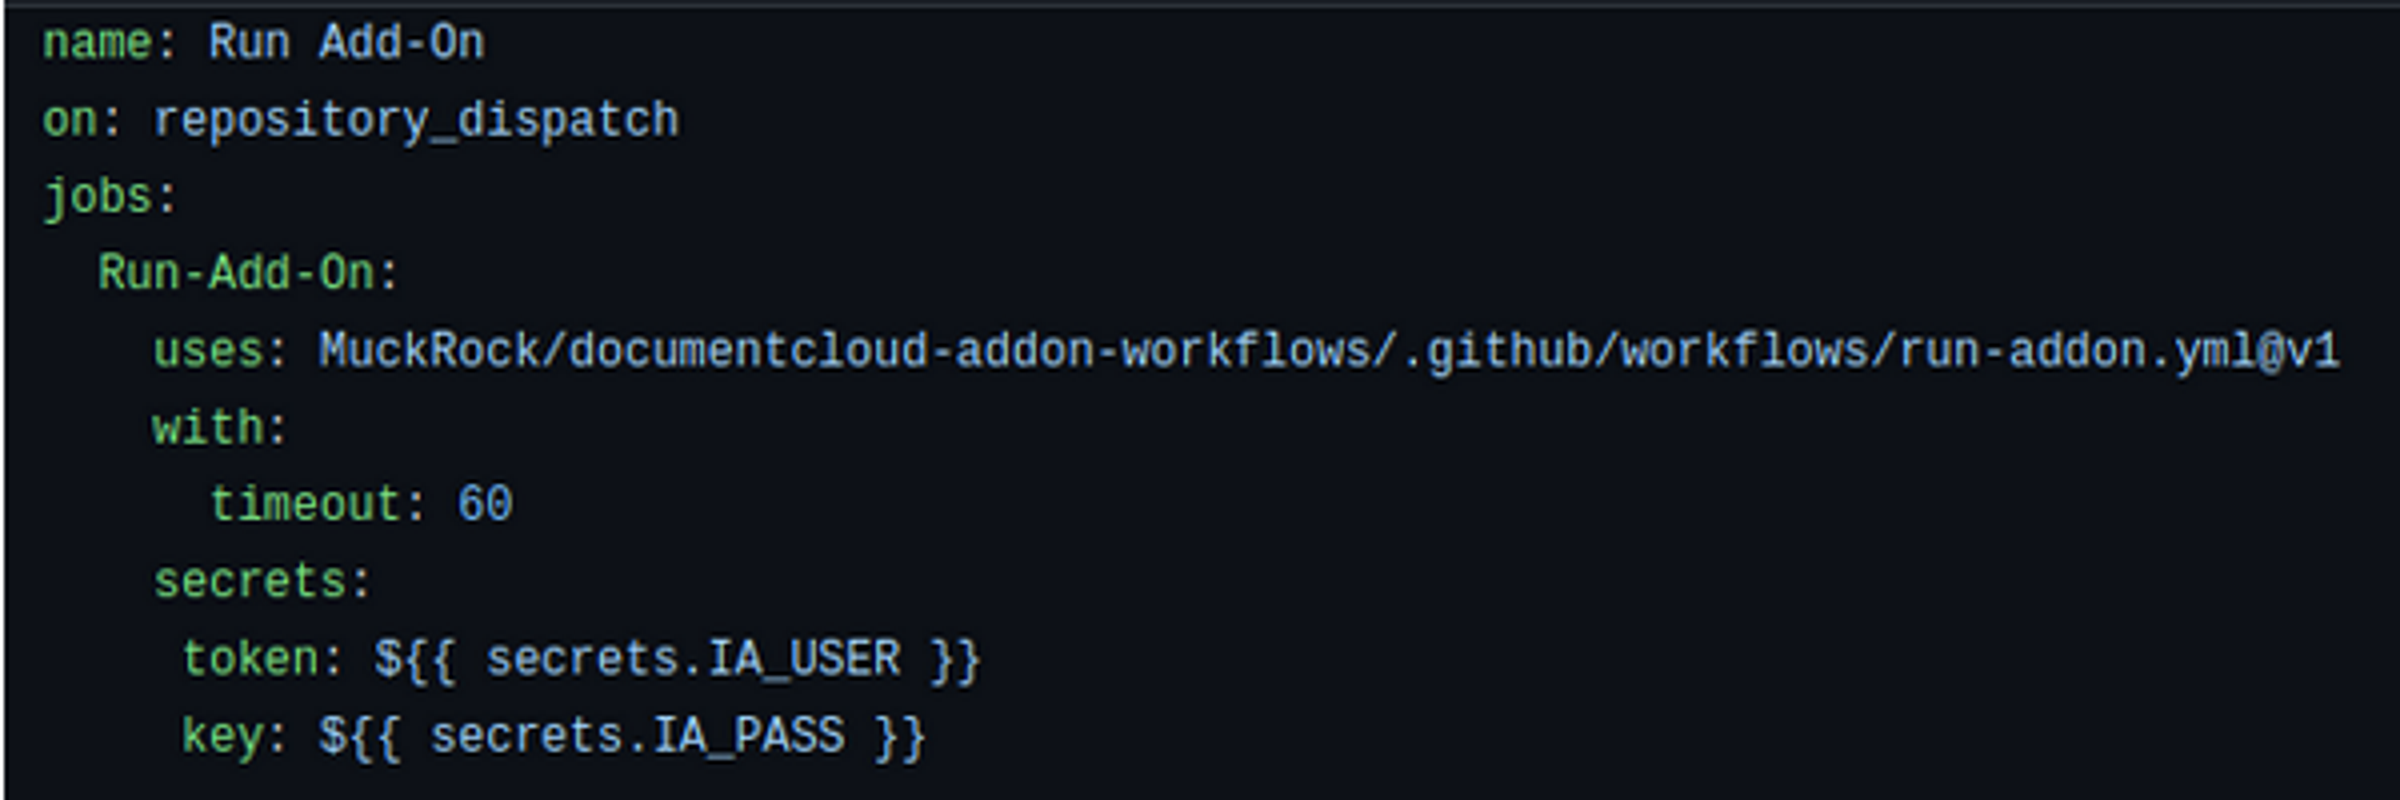
Speaking of run-addon.yml, it uses a template that mostly stays the same. You may want to add two modifications depending on what your Add-On is doing. One is adjusting the timeout for the Add-On, set by default to 5 minutes. Many Add-Ons seek to apply an action to dozens, hundreds, or sometimes thousands of documents. The max timeout for an Add-On is limited by GitHub actions to six hours (360 minutes). To configure the Add-On timeout, you can make this edit to the run-addon.yml workflow file. In this case, I set the timeout to one hour (60 minutes).
name: Run Add-On
on: repository_dispatch
jobs:
  Run-Add-On:
    uses: MuckRock/documentcloud-addon-workflows/.github/workflows/run-addon.yml@v1
    with:
      timeout: 60
One other modification you can make to the workflow is the ability to add secrets. The template workflow provides two secret, token and key, which are optional and available to Add-Ons.
Secrets are set up by each GitHub user in their own repository and are not visible to those who run the Add-On. It is a place to store variables that are sensitive- like API keys, usernames, and tokens that are generated that are needed to be used to run an Add-On.
To create a secret, you click on Settings from within the repo:

Then, click Secrets and add a repository secret:
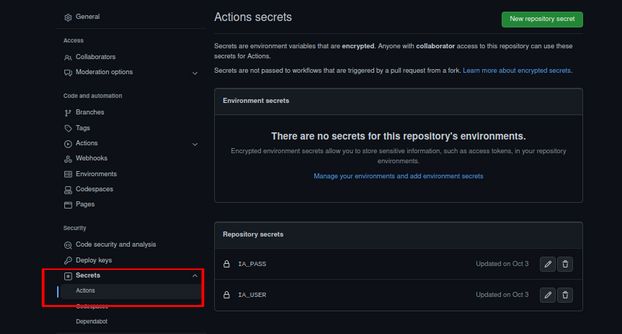
From there, you must declare secrets in the workflow file.
The secrets token and key are then accessible from within main.py.
First, you must import os at the top of main.py, and then you can access the environment variable secrets from within main.py like this:
# pulls the internet archive username & password secrets from the workflow environment.
ia_user = os.environ["TOKEN"]
ia_pass = os.environ["KEY"]
Additional documentation relating to DocumentCloud Add-Ons and the available parameters is available.
Testing
Once you’ve hashed out some of your functionality and want to test your Add-On, you can run it locally at first via the command line interface (CLI) or have it connect to your DocumentCloud account via our GitHub application.
When connecting the GitHub application, please ensure that the email to your GitHub account is the same as the one for your DocumentCloud account. You can set or change your MuckRock/DocumentCloud email. Please ensure that you give the GitHub application access to ONLY the Add-On, otherwise, we will be able to see all of your GitHub repositories which is undesirable.
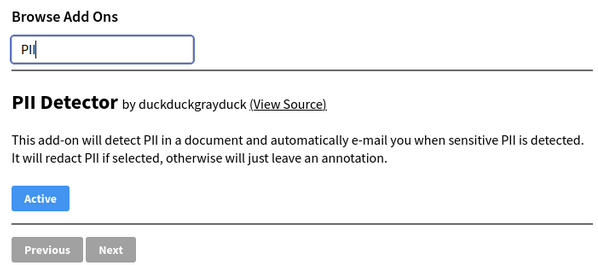
Once you’ve configured the DocumentCloud GitHub application, you’ll be able to see your Add-On under Add-On -> Browse all Add-Ons and search for it on your DocumentCloud account. This doesn’t mean that it is publicly available to other users, only yourself until you go through code review. Here is an example of an Add-On in development that is not publicly available yet:
To test an Add-On using the CLI, you will need to run the Add-On and either pass in your DocumentCloud username and password as command line arguments (--username and --password), or have your environment variables (DC_USERNAME and DC_PASSWORD) set in your PATH. Via the CLI you can pass in -- documents and the IDs of documents you’d like to run the Add-On for if you chose “selected” or via a query by using -- query.
Any properties you need to pass to your Add-On run via the CLI can be passed by using python --data '{"name": "World"}' For a full parameter reference, please see the documentation.
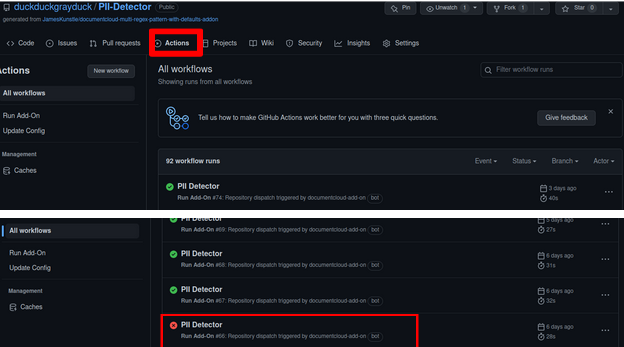
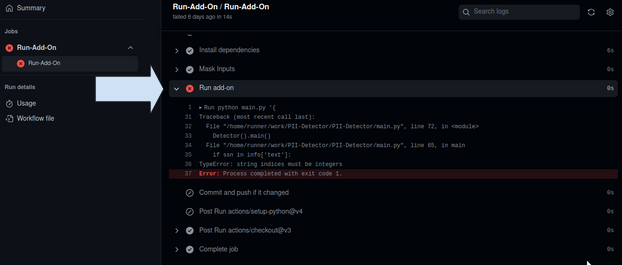
When you run a DocumentCloud Add-On via the DocumentCloud user interface, a GitHub Actions is triggered, and error messages are available for inspection as well by going to the repository, and clicking on “Actions”. If you experienced a failed run of an Add-On, you can click on the specific instance, click on the name of the run again, and then inspect the logs.
Register for our newsletter to get other tips and tricks for getting the most out of DocumentCloud or join MuckRock’s Slack to get help talking through your Add-On ideas. We can’t wait to see what you build!